...
- Create JNLP file for launching Java Web Start application.
The way to launch Java Web Start application is by using a JNLP (Java Network Launching Protocol) file deployed on the server, when user type the url of a jnlp file in the browser, the browser will detect that the response is JNLP file and it will launch the Java Web Start launcher to load the Web Start application according to the setting in the JNLP file. So a JNLP file needs to be created for the Nexaweb application.
The following JNLP file (jnlp.jsp) is provided as a template based on which you can customize to support particular settings and parameters for your own application:
Code Block language xml title jnlp.jsp linenumbers true <!-- This is temple jsp file for dynamic jnlp file. @author Jingtao Zhao @create Date 20160630 @version 1.00 --> <%@page import="com.nexaweb.server.jnlp.JnlpUtils"%> <% JnlpUtils jnlpUtils = new JnlpUtils(request,response);%> <?xml version="1.0" encoding="utf-8"?> <jnlp spec="1.0+" codebase="<%= jnlpUtils.getBaseUrl() %>ClientClassLoader" <!-- The jnlp file is dymaticdynamically generated inon the server, so don't changchange it. --> href="<%= jnlpUtils.getBaseUrl() %>jnlp.jnlp"> <information> <title>Standalone Client Launcher</title> <vendor>Nexaweb</vendor> <homepage href="http://www.nexaweb.com"/> <description>A<description>An application for Nexaweb DesktopStandalone Client</description> <description kind="short">Nexaweb Standalone Client short Description</description> <!--<offline-allowed/> --> <update check="always" policy="always"/> </information> <resources> <j2se version="1.3+" href="http://java.sun.com/products/autodl/j2se"/> <j2se version="1.3+"/> <!-- Please make sure these jars (NexawebStandaloneClient.jar,NexawebImages.jar) are putlocated toin your project's WebContent directory and signed, don't change it otherwise put their path directly in the href attribute --> <jar href="<%= jnlpUtils.getNexawebStandaloneClientJar() %>"/> <jar href="<%= jnlpUtils.getNexawebImagesJar() %>"/> </resources> <!-- Please don't change it, the main class is "com.nexaweb.client.standalone.StandaloneClient" from NexawebStandaloneClient.jar, don't change it --> <application-desc main-class="<%= jnlpUtils.getMainClass()%>"> <!-- ReadLoad startparameters params from nexaweb-client.xml --> <%= jnlpUtils.getParams() %> <!-- Read the cookie from the browser and set it tointo StandaloneClient as aan argument, if cookie is empty, getCookie() will return string"". empty.--> <%= jnlpUtils.getCookie() %> </application-desc> <security> <all-permissions/> </security> </jnlp>Note that the jnlp file is has a extension of jsp, this is to support the following deployment scenario:
Suppose user is running a web application A (e.g. HTML5 application) and from within A, user launches another application B which is the Nexaweb application, the default behavior of Nexaweb Standalone Client is that it will create a new session with the server, so all the data in the previous session are discarded. It could happen that this is not the desired case, i.e. user may want application B to use the same session from previous application A instead of creating a new one (e.g. SSO). To support such scenario, the JNLP file needs to be dynamically generated by the jsp to allow the existing session information to be injected into standalone client. Here are the details:
Note: Changes has been added to Nexaweb Platform to support the following, so make sure you have the latest release of Nexaweb platform
1) A servlet called JnlpServlet is added to Nexaweb Platform and in web.xml it is mapped to the url pattern "/jnlp" (in example application, it's "http://localhost:8080/JavaUIExplorer/jnlp"), it is responsible for dynamically generating the jnlp file using jnlp.jsp.
2) The above jsp is automatically generated by Nexaweb Platform when you upgrade to the latest version or create a new project in the latest version, it is located at: <project-name>\WebContent\Nexaweb\jsp\jws\jnlp.jsp (in example application, it's JavaUIExplorer\WebContent\Nexaweb\jsp\jws\jnlp.jsp)
3) A new configuration parameter has been added to nexaweb-client.xml called <jnlp-jsp-path> under <launch-configuration> section, to allow user to specify a different jsp file to use.
Info title Turn session inheritance behavior ON/OFF If you want the default behavior where a new session is created upon launching Nexaweb Standalone Client, you can simply comment out or remove the line of code that does the cookie injection:
<%= jnlpUtils.getCookie() %>
- Add Nexaweb Standalone Client support to Nexaweb application
To allow application to be loaded by Java Web Start launcher, the launcher needs to know the jar files and a main class to launch. Nexaweb Standalone Client provide the jar files as well as a main class to be launched. To add standalone client support to Nexaweb application, two jars are required: NexawebImages.jar and NexawebStandaloneClient.jar. They can be found in the "bin" folder of Nexaweb Platform's Installation directory
To add the support, it is enough to copy them into WebContent folder of the Nexaweb application, if you copy them to other places, you need to make sure to adjust their path in the jnlp.jsp file also (under <resources> section).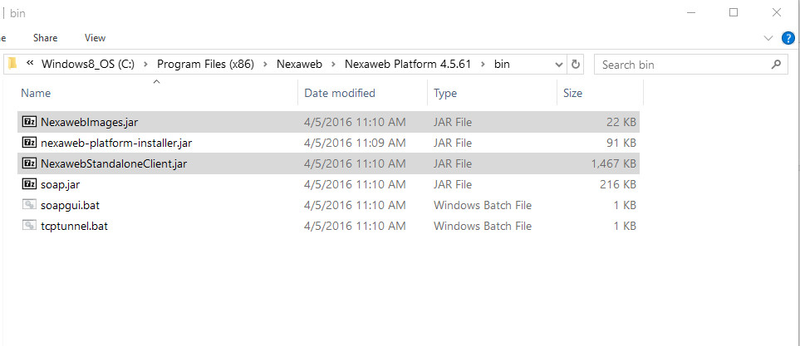
- Generate keys and sign the required jar files
The above two required jar files needs to be signed for Web Start Launcher to launch them successfully, which can be done as follows:- Generate keys by entering the following command at command prompt window:
keytool -genkey -keystore nxWS.keys -alias http://www.nexaweb.com/ -validity 365when prompted for password, use "123456789"
- Sign jar by entering the following command at command prompt window:
jarsigner -keystore nxWS.keys -storepass 123456789 [jar-file-name].jar http://www.nexaweb.com/After all the above steps, the WebContent folder of the application should look like the following (jnlp.jsp file and required jars are highlighted):
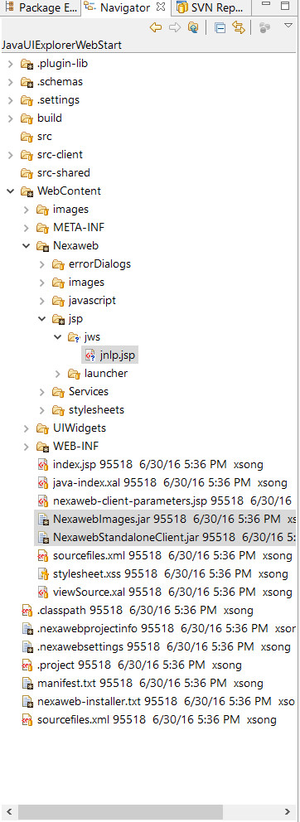
Like mentioned before, both the path of jnlp.jsp file and required jars can be configured to a different location.
- Deploy and launch Nexaweb application as Java Web Start from the browser
To launch the Nexaweb application as Web Start, user should supply the following url in the browser: http://<domain-name>:<port-number>/<app-name>/jnlp (in example application, it's http://localhost:8080/JavaUIExplorer/jnlp), the request will be handled by JnlpServlet, which will return the dynamically generated jnlp (with extension .jnlp) file based on the jnlp.jsp file (or a different jsp specified by the user in nexaweb-client.xml), when browser detects the returned response is a jnlp file, it will launch Java Web Start launcher to download and launch the Nexaweb Standalone Client.
...